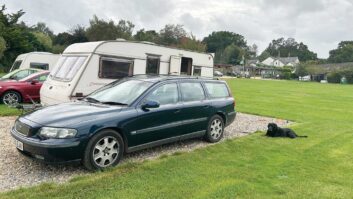
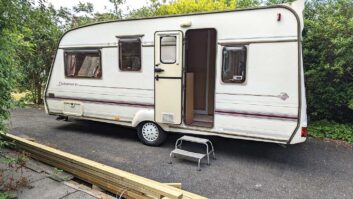
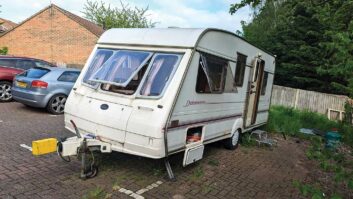
While waiting for parts to get Penny’s plumbing up and running, we looked at the other items on the to-do list that we could crack on with. When we came to do this, the new touring season was just around the corner, so we turned to making her look a little bit sharper and easier to use, by carrying out work around the A-frame.
We knew when we bought a 1998 Bailey caravan from Facebook Marketplace that a lot of work would need doing. Penny’s jockey wheel makes moving her around a chore, because it’s noisy and stiff to operate, and long overdue for some close attention.
We began by removing the jockey wheel assembly from the van. More modern vans typically have a jockey wheel that mounts through the A-frame, but, as you may find if you’re buying one of the best used caravans, Penny had an older, simpler arrangement, where the jockey wheel tube is just clamped to the outside of the A-frame.
With the caravan resting on her steadies, I wound the jockey wheel up clear of the ground and then slackened the locking clamp. By winding the clamp handle completely out, the clamp jaw is easily swung out of the way and the whole assembly can be released.
Jockey wheel issues
The initial triage on our jockey wheel quickly showed issues. Yes, it was grimy and in need of greasing and tidying. That was obvious from yards away.
Once we had the assembly in the workshop, however, it was plainly more serious than a bit of caravan cleaning and polishing.
We had noticed before that raising and lowering the wheel was hard work. It was noisy and needed a lot of effort, which we thought we could fix.
What was news to us was that the wheel did not turn freely – a fundamental flaw for something whose only job is to turn.

We aren’t talking a bit of light resistance. Spinning the wheel took a lot of force, which is plainly not normal. When you’re at one of the best caravan sites and are pushing the yourer onto a pitch, you don’t really notice. You just wish you’d had that extra Shredded Wheat before you started pushing caravans around. Plainly this was making life harder than it needed to be.
A closer look on the bench told us we were going to need a new assembly. The wheel was damaged, with the rim bent away from the rubber tyre.
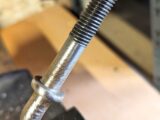
This contributed to the difficulty spinning the wheel, but putting the whole tube in the bench vice and looking from above, it was clear the cradle that holds the axle, and therefore the wheel, was bent. Presuming that this damage occurred when the cradle was bent, those were two parts that would need to be replaced – two-thirds of the assembly.

Time to upgrade the jockey wheel
Given that the wheel was an old-fashioned narrow model, thoughts turned to upgrades.
A wider wheel makes the van a little easier to move on softer ground. Buying a new assembly would be a simple, if more expensive, way to solve all of the problems. So that night, we costed up a replacement.
Cheap, pattern jockey wheel assemblies can be had for about £20 or so, but the basic Al-Ko replacement was still around for less than £40. However, that would still have a narrow wheel.
The next step up is an Al-Ko unit with a pneumatic tyre, but experience has told me they spend most of their time flat, adding an additional layer of grief that is not needed.
The unit you ideally want is the Al-Ko heavy-duty caravan jockey wheel assembly. These are common on new vans and have a wider, all-plastic wheel. At close to £70, these are not a cheap purchase.
I’m always looking for useful ways of caravanning on a budget, so I started my search on Facebook Marketplace and eBay to see if there was anything local. What I found on eBay was what can be considered the Rolls Royce of Al-Ko jockey wheels. The Premium Jockey Wheel costs around £150. For that, you get a big fat wheel and a removal handle as a passive security feature. Best of all, you also get an integrated noseweight gauge, meaning there is no more mucking about with kitchen scales and bits of wood trying to balance the caravan loading.

It was a long way away, but the seller was prepared to post it. I put in a bid and decided to wait and see what happened.
While the auction ticked by, attention turned to tidying the scruffy A-frame fairing. This large piece of GRP covers the chassis at the front, but looks every one of its 23 years, with extensive cracking and chipping needing improvement if it was going to be reused.
The alternative is to leave the van without the fairing, but that looks a bit sore, so we decided to start tidying it up instead.
Having done a bit of GRP repair in the past, I knew what we would need to do. There was one actual crack in the fairing, which was the worst of the damage. Aside from that, it was chipping and light cracks in the gelcoat top layer of the piece that required repair. They are time-consuming, but it is not that difficult.
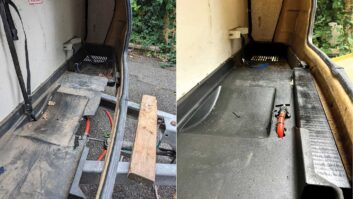
The other thing that needed to be attended to was a result of my previous fix to the gas locker floor. The gas locker has a plastic tray, which is the base that carries the cylinders and other stuff that you cart around when touring. In Penny, this was badly cracked and damaged, so I set about beefing it up.
Reinforcements
First, I made a plywood plinth to support the leading edge of the shelf – it works really well. I realised that it reduced the space available for the A-frame fairing by 20mm and I now needed to adjust something to get it back in place. Given the excellent and thorough work that I had done previously when repairing the gas locker floor, I did not fancy unpicking it again, so I decided that the simplest option would be to remove 20mm from the back edge of the fairing.
After a bit of measuring up, I marked the GRP and placed strips of tape across it as a guide for my jigsaw. With a fine-toothed blade installed, I trimmed the trailing edge of the fairing. A quick test fitting confirmed that it would all fit, so it was time to don the dust mask and start repairing the cracks and dings.

Glass-reinforced plastic, GRP, glass fibre or fibreglass are all names for the same material, widely used in caravans, boats and even car manufacture.
It is pretty tough, lightweight and happily, much easier to fix than ABS plastics, also commonly used. The structure comprises layers of matting, which are bonded together by a plastic resin. The shiny outer surface is the gelcoat, which is tough and resistant to the weather. Most of the damage we found in Penny was confined to this layer.
The way to fix shallow surface cracks is to grind along the line of the crack to create a V-shaped channel. You can then get some gel coat and force it into the channel, then allow it to cure.
Once it has set, the whole surface can be rubbed down to get back to a hard, shiny and crack-free surface. In fact, the gelcoat comes colour-tinted, so if you are lucky, the repairs should be pretty seamless.
I didn’t have gelcoat in stock, so I decided to press on with grinding out dozens of cracks, so that I could get the repairs quickly under way once I got my hands on some.
I used a Dremel with a round sandpaper bit to trace all of the cracks. We got through six of these bits, creating a lot of dust in the process. At this stage, the fairing looked worse than before, so we were delighted when the postman arrived with the new eBay jockey wheel for us to install.
Reassembling the jockey wheel
The jockey wheel had arrived disassembled for postage, but that was fairly handy, as we wanted to grease and clean it up before installing it.
While assembling it, we also noticed a few signs of wear and tear, which started to make our bargain look less impressive than we had hoped. We liberally coated the sliding tubes, handle and threaded nut with grease and installed it on the van.

On the plus side, when we had everything assembled and greased up, the new jockey wheel did spin, which made it better than our old one. But the wheel has a definite buckle to it. It works, but it’s damaged and a replacement wheel on its own is £80. At that price, we decided we’ll put up with it.
The other issue is that the noseweight gauge doesn’t work very well, reading around 60kg before it touches the ground.
Given that, we could have had a new jockey wheel without a gauge for about the same as we spent on this one. Now we’re heading off to research whether we can do anything to restore our gauge to health.
If your jockey wheel is in need of a change, take a look at our guide to how to replace a jockey wheel where we talk you through the process.
Future Publishing Limited, the publisher of Practical Caravan, provides the information in this article in good faith and makes no representation as to its completeness or accuracy. Individuals carrying out the instructions do so at their own risk and must exercise their independent judgement in determining the appropriateness of the advice to their circumstances and skill level. Individuals should take appropriate safety precautions and be aware of the risk of electrocution when dealing with electrical products. To the fullest extent permitted by law, neither Future nor its employees or agents shall have any liability in connection with the use of this information. You should check that any van warranty will not be affected before proceeding with DIY projects.
If you’ve enjoyed reading this article, why not get the latest news, reviews and features delivered direct to your door or inbox every month. Take advantage of our brilliant Practical Caravan magazine SUBSCRIBERS’ OFFER and SIGN UP TO OUR NEWSLETTER for regular weekly updates on all things caravan related.


